Assembly Guide
Kickstart your 3D printing journey, build your Spero Autoflex today!
Spero Autoflex is a revolutionary hardware extension designed to automate the process of removing printed parts from your 3D printer's bed. We're thrilled to guide you through the assembly process so you can create your very own Spero Autoflex and elevate your 3D printing experience.
In this assembly guide, we'll walk you through each step of the process, from gathering the necessary materials to assembling the components and calibrating your device for optimal performance. With our detailed instructions and helpful tips, you'll be well on your way to enjoying the convenience and efficiency of Spero Autoflex in no time.
But that's not all – we believe in the power of community and collaboration. That's why we've made all the design files and information readily available on our GitHub repository, allowing you to customize and improve upon the design to suit your specific needs.
Additionally, your support means the world to us. By backing our project, you're helping us bring the final product to market and making Spero Autoflex accessible to creators and makers worldwide. We're immensely grateful for your support and excited to embark on this journey with you.
Let's dive in and start assembling your Spero Autoflex!
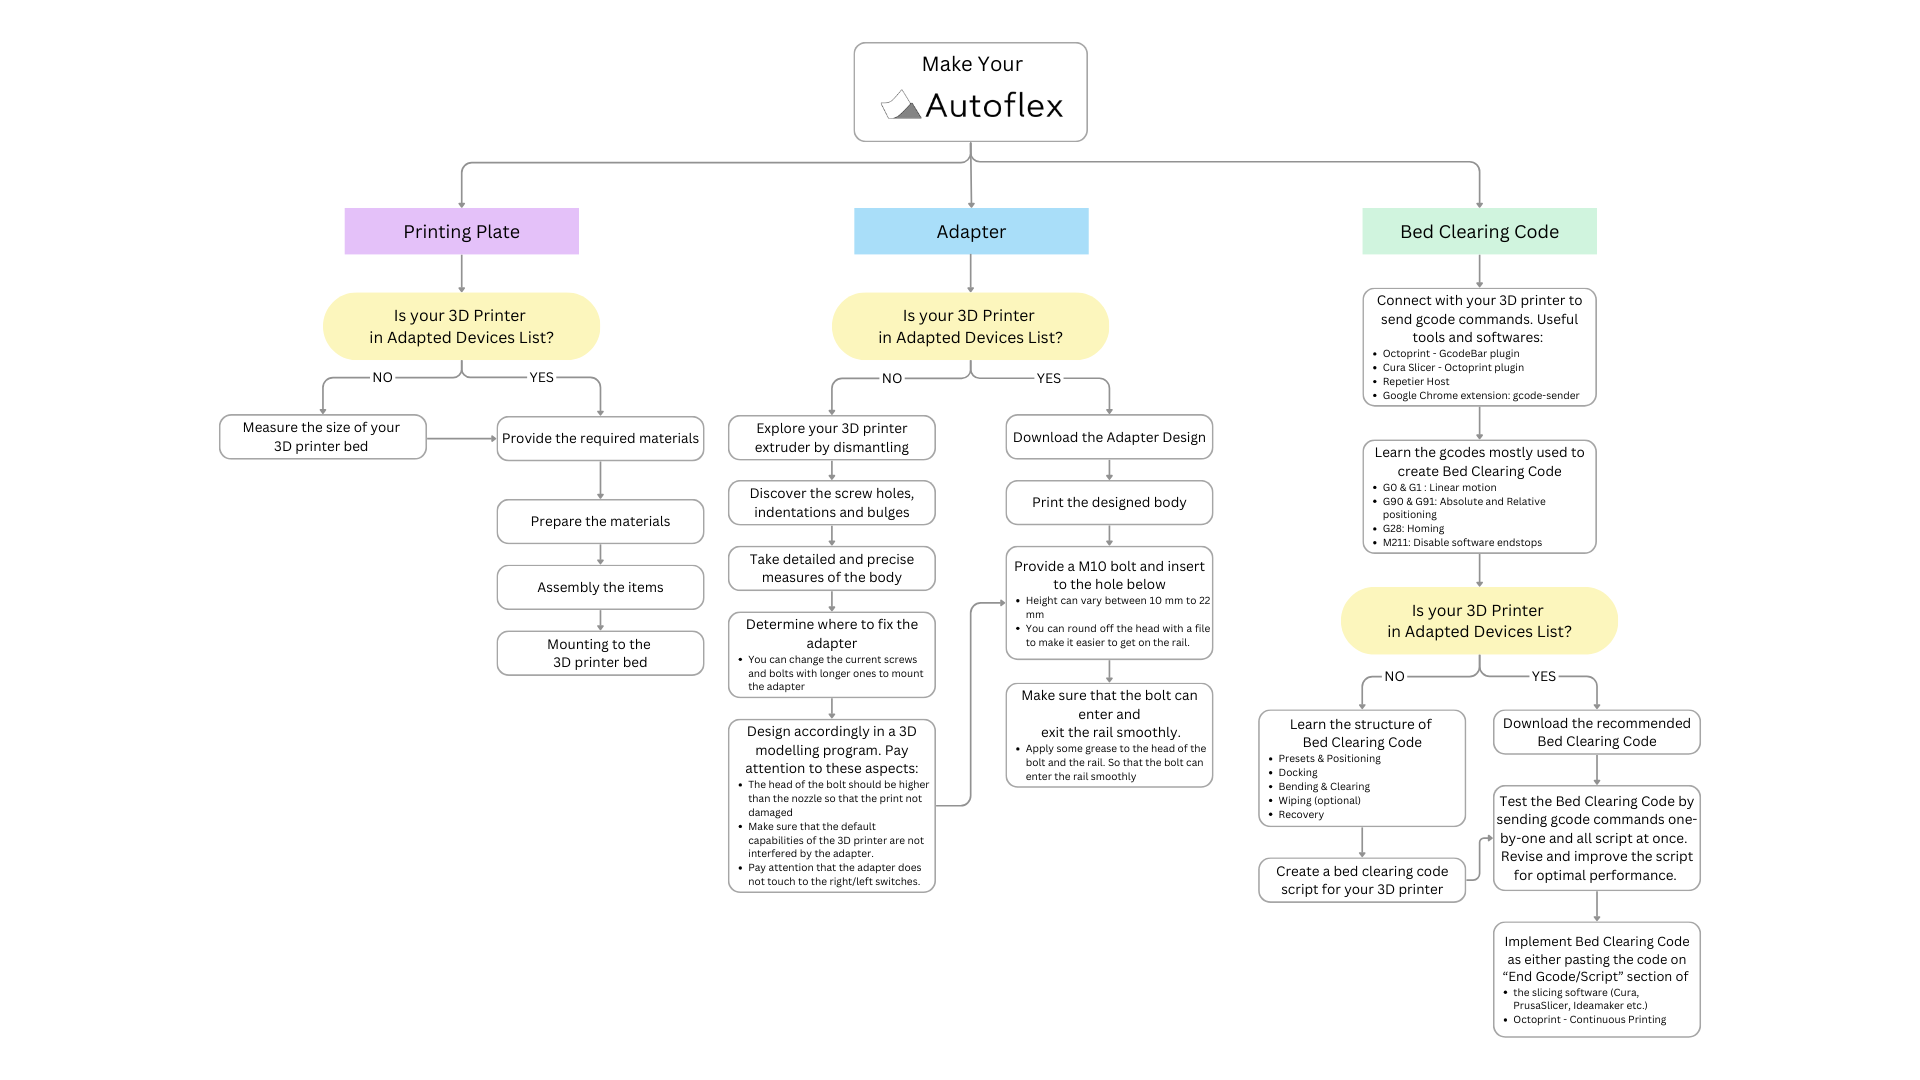
Take a look at the diagram below to gain a clear understanding of how to build Autoflex and to receive step-by-step guidance throughout the process.